Planning your Plumeria Seasonal Care Regimen
I want to share our vision of the best Plumeria care regimen for all plumeria growers. I hope the following helps you with your goals and plans.
The goal is to know what, when, and why, so you can improve every year by giving your plumeria the best growing conditions. Making a plan and documenting all adjustments will allow you to look back and hopefully determine where you can make improvements.
At the beginning of each season, we examine what we did last year and determine how to improve our methods and products. The following is an outline of what we’re planning for our 2017 Care Regimen at Florida Colors. Please keep in mind your growing environment and how it differs from South Florida Zone 10B. The start of your plan should correspond to when you are past the threat of a frost or freeze. You should also make a plan to protect your plumeria from cold weather, just in case you get caught.
Before your spring growing season starts.
I highly suggest getting a Soil Test to determine what nutrients your soil has or doesn’t have. The more you know about your soil and environment, the better decisions you can make about caring for your plumeria. The soil test will indicate what nutrients are present but locked up or that you need micronutrients.
Removing damaged branches and roots.
When: Before putting them out for spring.
What: Start by checking your plumeria for signs of insects, branch or root rot, soft branches, bent branches, or broken branches.
How: Cut all damaged branches until you see all white when possible. Trim roots until you see white or green.
Why: Remove dead, damaged, and diseased branches and roots help to prevent insect & decay organisms from entering the plumeria. Eliminate crossing branches to prevent damage caused by their rubbing against each other.
Checking and Spraying tips for insects
When: Before putting them out for spring from storage or as leaves and blooms start to grow
Greenhouses & pots, you should have been controlling pest all winter. But it is still a good idea to treat before taking out. I suggest you spray two weeks before taking them out and again right after taking out for Spring.
In the ground, I suggest you start spraying as soon as you see the leaves emerging. (Do not spray in direct sunlight or on dehydrated plants)
What: Suggest – Summit Year-Round Spray Oil
How: Spray or mist to cover the entire plant.
Why: By treating with Year-Round Spray Oil or similar, you kill the insects and eggs. Giving your plants a good healthy start. Horticultural oil controls insects without synthetic chemicals. Mites including Rust Mite / Spider Mite (also eggs), Scales including Black Scale, California Red Scale, Whitefly and Blackfly (also eggs), Sooty Mold.
Plumeria waking up from Dormancy
When: As soon as you see signs of your plumeria waking up and if the weather allows.
What: Soak your plumeria roots with a mixture of water, root activator, and a bio stimulate to help give them a kick-start.
What we suggest: A mixture of Vitazyme and Carl Pool’s Root Activator.
How: Soak your bare-rooted plants for about 1 hour. Soak your potted plants from the bottom-up or drench. Drench your in-ground plants with 1 to 2 gals.
Why: A bio stimulate helps the plants’ overall health, and the root activator gives the roots a kick-start with what they need to wake up and start growing as soon as possible.
Watering – Water heavy for the first two days and water-heavy every other day for the first week. After that, water as needed.
Re-potting or adding soil
When: In the Spring or when they outgrow their pots or need additional soil to top off the pot.
What: A good, well-balanced, and well-draining soil. I prefer to use soil without any fertilizers and a good decomposed natural mulch without additives.
What we suggest: Promix BX Mycorrhizae or similar soil mix (especially to start the season or a mixture of 1/3 Canadian Sphagnum Peat Moss, 1/3 coir, and 1/3 Perlite – horticultural grade.) or a similar soil mix.
How: The goal is to provide new soil to add back washed away nutrients to the roots. Gently shake off as much of the old soil as possible and fill in with fresh soil. Water in well and add more soil as needed. I also like to add decomposed natural mulch, 1”-2” in the bottom and 1”-2” on top of pots depending on the pot size. This adds some organic matter as it decomposes and helps keep the weeds out and moisture in.
Why: Fresh soil provides aeration, retains moisture, and adds back nutrients that were washed out. Over time, the organic materials that the soilless mix is made from the breakdown and decompose to the point where you will lose the drainage and aeration properties inherent in soilless container media. When that happens, discard the old soil to the compost pile or the garden and refill the container with fresh soil mix.
Mulching – in-ground plants – use a decomposed mulch to add nutrients and organic matter as the mulch decomposes. The mulch on the top also helps keep weeds down and helps retain moisture. I cover the ground around the trunk with natural mulch partially decomposed up to 12” deep each year for plumeria planted or plunged in the ground.
Watering – Always water well for the next two or three days.
First fertilizing – Granular
When: At the beginning of the growing season
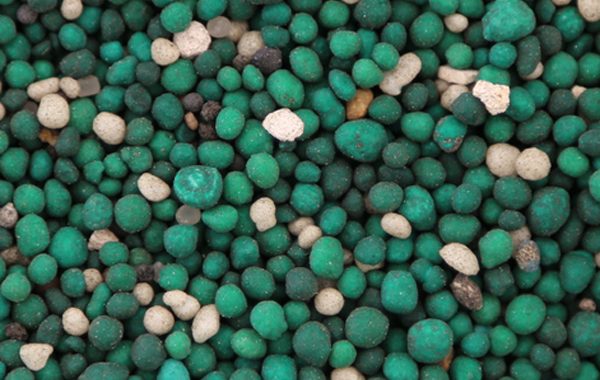
What: Use a balanced granular slow-release fertilizer with micronutrients.
What we suggest: Excalibur VI (6-month NPK of 11-11-14) and IX (9-month NPK 11-11-13) with micronutrients designed specifically for Plumeria or similar fertilizer.
How: Mix in with the soil, usually in the top 1”- 2” and water well.
Why: Granular fertilizer is designed to feed your plumeria from the roots. Healthy roots ultimately produce healthy plants. We have found that a balanced NPK fertilizer with micronutrients produces very healthy growth, promotes blooming, bloom size, and seed production. It is imperative not to add any fertilizer high in nitrogen, phosphorus, potassium, or anything else unless you know your plumeria needs it.
Foliage Fertilizing – Thru out the growing season.
When: From every two weeks to every month.
What: A Balanced fertilizer with micronutrients.
What we suggest: Bioblast with micronutrients and an NPK of 7-7-7. We also spray with Vitazyme every time we spray with fertilizers or similar fertilizers.
How: Foliar feeding.
Why: This is used to improve the overall health from the top down and give the leaves and blooms nutrients during stressful times.
 Understanding Plumeria’s Seasonal Cycles
  Mealy Bugs Plumeria Pests
  Plumeria Care for Seeds and Seedlings
  Caring for your Plumeria 101
  Fertilizer Basics
  Known Plumeria Names